NEW CLASS AVAILABLE


You'll love this class. The fun packaging and the cards are great. There re 3 fun fold cards and some fun techniques to learn. I would love to have you join.
Can't attend in person, ask me about a tutorial?
See more detials HERE


NEW CLASS AVAILABLE
THREE DAYS ONLY

Sales Period: November 13–15
From the 2024–2025 Annual Catalog:
Shop online to see the full selection of discounted products available; this is a limited time offer.
Products are available while supplies last.
Discounts are automatically applied when sale items are added to any order, including Starter Kits.


What a great time to stock up on supplies for your Christmas Crafing. Is your cardstock supply going to see you through. Is there a bundle in the annual catalog that that you were dying to have? Now is your chance.
Shop Online Starting Tuesday


Tip #1 - I loved the easy cutting instructions. But here's my first caution.... When cutting pattern paper be sure to follow the instructions for direction on BOTH sides of the pattern paper. I goofed but thankfully I lucked out and my Christmas trees were not sideways on my paper. LOL
I cut all the paper first and placed the pieces in piles according to layout number.
Tip #2 - instructions tell you to label each piece by layout number & a letter (which ties to the layout diagram). That's a lot of work. I left that step out - placing the pieces in a pile by layout number was good enough. It was pretty easy to see where each piece belonged on the layout without the letter code.
Tip #3 - you need enough space to layout the pages side by side so you can make sure to line up the elements. This will create a better look when you view your layouts in a book.

Tip # 4 - Just in case you don't have your photo's ready when you start the process, you can add the photo place holders. But be sure to add them with removable adhesive.
Tip # 5 - Don't be afraid to switch a 4 x 6 photo with two 3 x 4 photo's (or visa versa) depending on which photos you are using. If you have your photos ready, that will make the process so much easier.
Tip #6 - The last layout called for me to use the pretty patterned paper for the base layer. But only the top and bottom 1/2" was visible in the layout. So, I used a piece of Basic White 12 x 12 for the base layer. Then I cut two 3/4" strips from the pretty patterned paper and glued them across the top and bottom of the page. That allowed me to have a full sheet and a partial sheet to use for another craft project - THINK CARDS or another layout.

This kit had plenty of supplies. I had such a collection of leftovers: 4 full sheets of cardstock/patterned paper, several half sheets and lots of smaller pieces. There were also some stickers that I did not use.


Although I stuck with the design as directed, I could see there are lots of ways you could change it up a bit to use your own creativity!
Next time I'll try adding some of my own stamped images and die cuts to make it really "mine". WHAT FUN! I am definitely hooked.


Four Corner cards Technique
Borrowed from Patty Bennett @ PatttyStamps.com
I loved this idea from Patty and had to try my own. So I started with a pattern of snowflakes
I stamped on a piece of Basic White cardstock that is 10" x 7 1/2" using multiple colors and patterns creating a cross on the paper. You can see the pattern I used in this picture

When the cardstock is cut into four pieces, each 3 3/4" x 5", you have the card fronts for 4 cards. Each card will have a similar design but the stamping will be in a different corner. Add a mat that is 4" x 5 1/4" and then add this to a card base and you will have four beautiful cards to decorate as you like. Hope you can see the splatter of Wink of Stella that I used.

I used Azure Afternoon, Coastal Cabana, Boho Blue and Pretty Peacock for my snowflakes. I used the snowflake images from two stamp sets: Sparkling Snowflakes and One of a Kind.

I started with the largest image, using the darkest color (Pretty Peacock) and stamped randomly down the center and across the center. Next I stamped in the Azure Afternoon in a random pattern, filling in a few of the empty spots. Then the Coastal Cabana and last the Balmy blue.

I cut the snowflakes from Silver Foil to decorate the cards. Did you know that the die from One of a Kind cuts the snowflake image in Sparkling Snowflakes? Perfect product coordination that Stampin' Up! is so famous for.
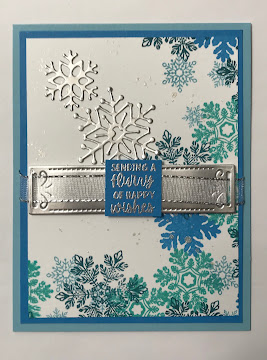
Then I added the wonderful labels using the Peaceful Season Bundle.
Want to purchase any of the products I used for these cards? Click on the links below the post.
I would love to know what stamp set you might use for this technique. Leave a comment to share.
") | ") | |
 | ||
 | ||
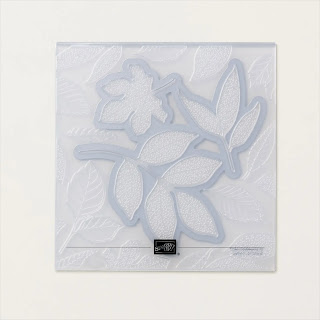
Changing Leaves Bundle with Hybrid Embossing Folder


") |  | |
| |  | |
 |  | |
 | ") |  |
")
")
")
")
")


 Foil Sheets")
 Sheer Ribbon")


 Trim Combo Pack")