Friday, August 30, 2024

Mixing it up with Stampin' Up!

A Grand Mishmash of Products


This beautiful layout was inspired by Tammy C Wilson at Stamps, Paper, Scissors. Thanks to Tammy for this beautiful idea. 

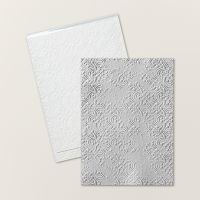
I had fun using the new Two-Tone 12x12 cardstock that Stampin' Up! just added to its line of products. This color is Mink. The paper was acquired from CTMH (Close to My Heart) after it went out of business earlier this year. 


I love the two-tone look of this paper. I used the darker shaded side for the embossed panel and the lighter shade for the stamped greeting. Be aware that the ink does not dry as quickly on this cardstock as it does on Stampin' Up! traditional cardstock.

Also note - the paper is white inside. You can use a sanding block to run over the embossed image and the white will come through to give a wonderful vintage look. I noted a sight drawback. The paper is not as thick, and the black ink will bleed through to the other side (only slightly) so you cannot turn it over and use the other side if you make a mistake. 

I know I'm going to enjoy using this new line of products.


The card was so fun and it's a mishmash of so many products. Some new, some old.

The greeting and splatter come from a set called Love & Strength (item # 164252). This beautiful set will be available to purchase on Sept 4, 2024. 

The Bird and the banner shape are cut from some new paper as well. It was released earlier this year as a special purchase and now it will be available in the Winter Mini on Sept 4. 2024. It's called Nests of Winter (item #164183).

The bird was "fussy" cut and I used the wonderful "Take Your Pick Tool" pack add on that includes a craft blade. This is a must have for fussy little spots like between the bird and the branch. 

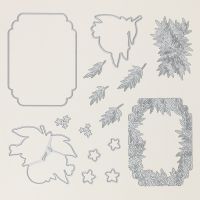
Dies for the foliage are from Citrus Blooms and Country Flowers. I love both of these bundles and use them often. 

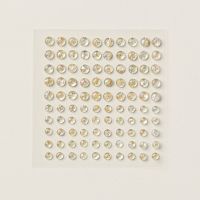
My favorite bit of bling is the Iridescent Foil gems. They are delightful.


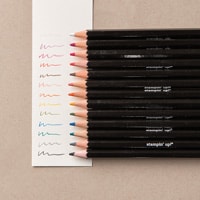
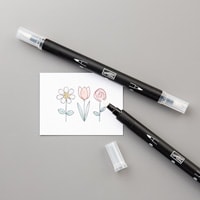
Inside, I stamped the bird from the coordinating Winterly Winterly Tree Tops stamp set coming out 9/4 (#164184). I colored the birds with Watercolor Pencils and blended the colors with the blender pen. 

 Items that are available for purchase will be listed at the bottom of this post. You can just click on them to be taken to my store.  Items that are going to be released on 9/4 are noted above. 

If you don't have an Annual Stampin' Up! catalog, you can download a pdf copy from my sidebar. If you want to get a copy of the Winter Mini catalog, come back on 9/4 to download your pdf copy. If you are a customer of mine, you should have received your printed copy in the mail.  Let me know if you didn't receive yours!

Like this card? Leave a comment!


Product List
Blender Pens
[102845]
$14.00

Tuesday, August 27, 2024

Scrapbooking has arrived at Stampin' Up!


Yippee! I'm Excited by this new offering!

And you will be too!. You can download the attached PDF catalog and see more about this new line in the videos. Be ready for SEPTEMBER 4 when the Mini Catalog and the Scrapbook Kits go live! 

Click on the picture to download the pdf catalog  

DEMO_MKTL_SQR_US_0924_CTMH.jpg

Scrapbooking Workshop Kits by Stampin' Up! (click link to see video in youtube)

image.png


And if you want to know more about the new line of 12x12 cardstock (available 9/4/24), check out this video

image.png

Two more days to get DSP on Sale - be sure to shop today


Sunday, August 11, 2024

Stampin' Up! Magnolia Mood with Floating Panel - Delightful!

 Floating Panel - Just Delightful!

I loved this idea inspired by Jaybe Crafts on YouTube


I added a panel of Basic White cardstock to a sligtly larger panel of Gold Foil. This is added to the card with Stampin' Dimensionals.

The stips of designer series paper and gold foil are attached to a bit of acetate and then trimmed to size with a die. The paper is from online exclusives and its called Season of Green and Gold. Be sure to measure the size of the die you are using so you can determine the width of the strips. For example, if your die is 4" square, you will need to cut the strips 1" wide. Or you can cut them 7/8" wide and have a bit of space between the strips.


Money Saving Tip: I used the acetate that is included with Photopolymer stamps from Stampin' Up! After I move my stamps to the stamp case, I save the acetate and use it for projects just like this. 

Be aware of the thickness of the panel. Try not to use heavy cardstock and or heavy acetate for this technique because the die might not cut the through. However, even if you don't get a complete cut, you should be able to trim the rest of the way with scissors. 

I used the Stylish Shapes Dies to cut the panel and then set it up from the card front with Stampin' Dimensionals. 


The greeting is from the Unbounded Love stamp set and it is embossed with gold embossing powder. This set is filled with wonderful greetings.


The die cut flower, which is glued on top of the panel, is from the online exclusive set called Magnolia Mood.


This card is simple but elegant.

Think of all the fun ways you can make this card with ?)different papers, colors and die cuts. You might want to try circles or rectangles(even a heart . And - be sure to check out Cindy Lee Bee Designs (https://cindyleebeedesigns.com/) for another version of this idea. Have FUN with this one.

This is a perfect chance to save on DSP! 

All month 15% off


Check out the new Card Kits - you will Love the Haunted Home Kit


Tuesday, August 6, 2024

Designer Series Paper Sale, NEW card Kits, August Card Class & More


15% Off Designer Series Paper from the Annual catalog! This sale starts today and ends on August 31. To see more --SHOP HERE


August Card Class - Pick your day and your designs. August 14th (1 pm) or the 18th (6 pm).  Deadline to register 8/10 ---SEE MORE HERE


These kits are WOW --- New Card Kits released today!  SEE MORE HERE